Creating desserts that are both delicious and visually striking doesn’t have to be complicated. If you’ve ever admired the elegant striped design of a zebra cake but felt it was beyond your baking skills, think again. This guide will walk you through every step to make a stunning zebra cake from scratch. Perfect for any occasion, this delightful dessert combines the flavors of vanilla and chocolate in a show-stopping pattern that’s easier than you think to master.
Table of Contents
What Are Zebra Cakes?
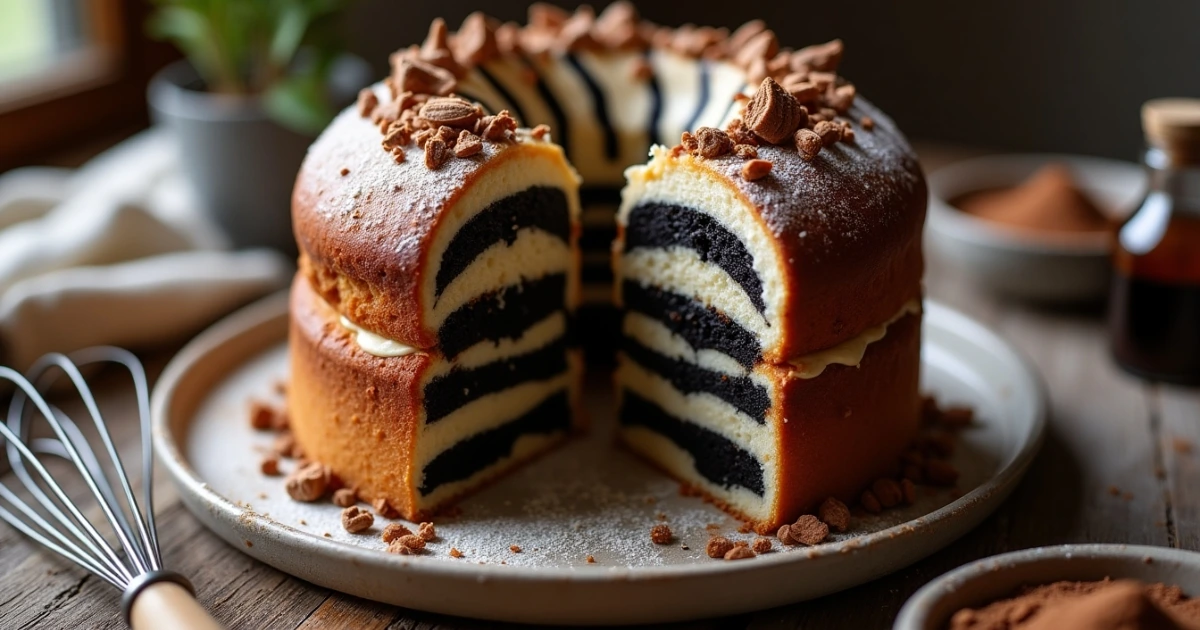
Zebra cakes are more than just a treat; they’re an art form. These cakes are named after the iconic zebra pattern, achieved by layering vanilla and chocolate batters in concentric circles. Unlike marble cakes, which feature a swirled design, zebra cakes boast a distinct striped look that’s as fun to create as it is to eat.
Whether you’re baking for a birthday party, a casual gathering, or simply to satisfy your sweet tooth, zebra cakes offer a delightful combination of taste and presentation. Their versatility makes them suitable for both kids and adults alike.
Ingredients You’ll Need
To make your zebra cake, you’ll need some basic baking ingredients, most of which you probably already have in your pantry. Here’s a detailed breakdown:
| Ingredient | Quantity | Purpose |
| All-purpose flour | 2 1/2 cups | Base of the cake batter |
| Granulated sugar | 1 cup | Adds sweetness |
| Baking powder | 1 tbsp | Helps the cake rise |
| Eggs | 3 large | Adds structure and richness |
| Vanilla extract | 2 tsp | Enhances flavor |
| Cocoa powder | 2 tbsp | Provides chocolate flavor |
| Milk | 1 cup | Adds moisture |
| Vegetable oil | 1/2 cup | Ensures a tender texture |
Step-by-Step Instructions
Preparing the Batter
- Mix the Dry Ingredients: In a large mixing bowl, combine the flour, sugar, and baking powder. Whisk together until evenly mixed.
- Combine the Wet Ingredients: In a separate bowl, beat the eggs, milk, vegetable oil, and vanilla extract. Ensure the mixture is smooth and well-combined.
- Create the Batters: Gradually add the dry ingredients to the wet mixture, stirring until a smooth batter forms. Divide the batter equally into two bowls. In one bowl, mix in the cocoa powder to create the chocolate batter.
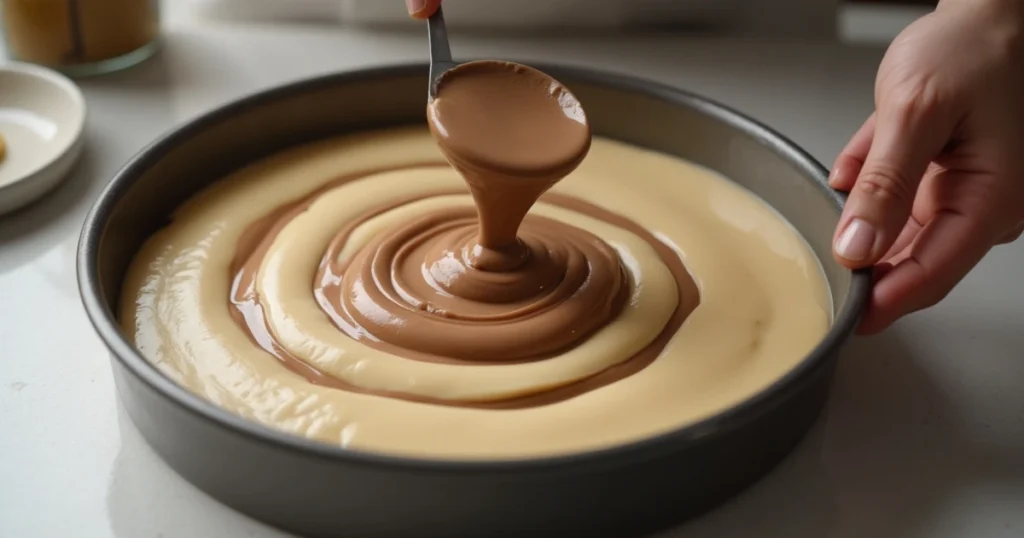
Creating the Zebra Pattern
- Lightly coat a 9-inch round pan with oil or butter, and place a layer of parchment paper at the bottom.
- Using a ladle or spoon, pour a scoop of vanilla batter into the center of the pan. Next, pour an equal amount of chocolate batter directly on top of the vanilla batter.
- Continue alternating batters, pouring each scoop into the center, allowing it to spread outward naturally to form concentric circles resembling a zebra’s stripes.
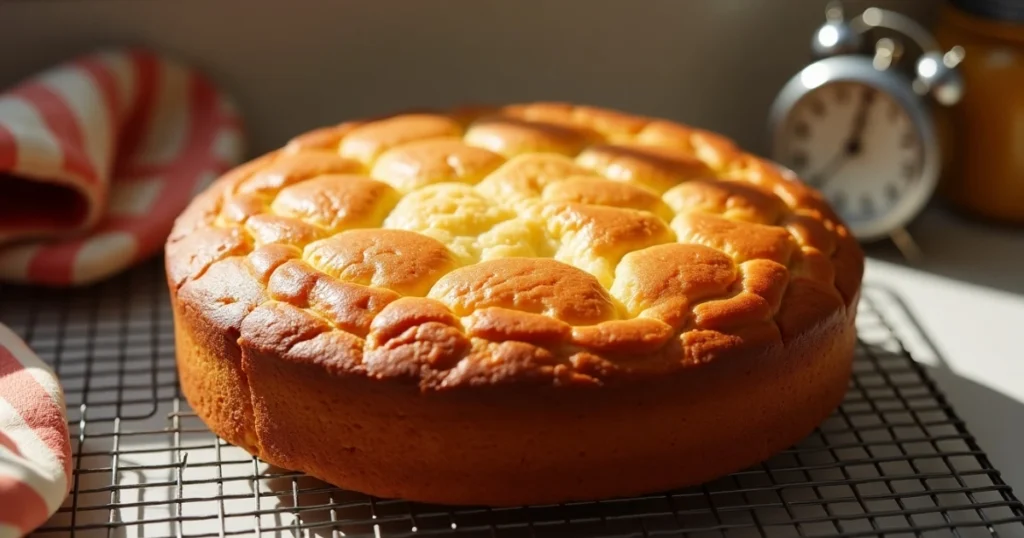
Baking the Cake
- Preheat your oven to 350°F (175°C).
- Cook the cake in the oven for 30 to 40 minutes, checking for doneness by inserting a toothpick into the center—it should come out clean.
- Let the cake rest in the pan for about 10 minutes, then move it to a wire rack to finish cooling entirely.
Tips and Tricks for Perfect Zebra Cakes
- Smooth Batter is Key: Ensure both vanilla and chocolate batters are lump-free for a seamless pattern.
- Steady Hands: Pour the batter slowly and steadily to maintain distinct rings.
- Experiment with Flavors: Add almond or orange extract for a unique twist.
- Decorate Simply: A dusting of powdered sugar or a drizzle of chocolate glaze can elevate the cake’s appearance.
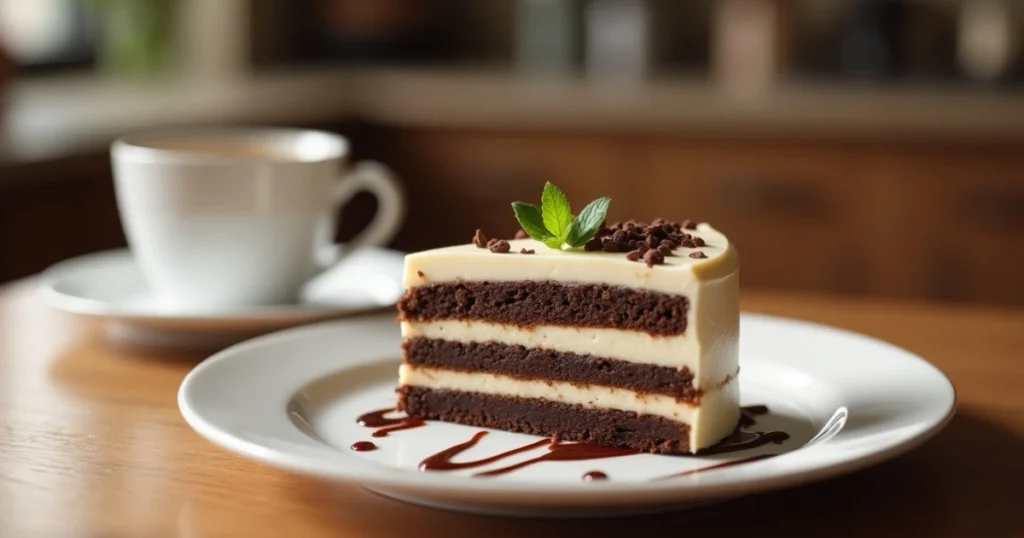
Serving and Storing Zebra Cakes
Once your zebra cake has cooled, slice it to reveal the mesmerizing stripes. Serve it as is, or pair it with a scoop of vanilla ice cream for a decadent treat.
Storing Tips:
- Room Temperature: Keep the cake in a sealed container for up to three days.
- In the Refrigerator: Store in the fridge for up to a week, making sure it’s tightly wrapped to prevent drying out.
- Freezing: Securely wrap each slice in plastic wrap and store them in a freezer-safe bag.
Bonus Section: Nutritional Information
Here’s an approximate breakdown of the nutritional value per serving (based on 12 servings):
| Nutrient | Amount |
| Calories | 250 kcal |
| Protein | 4 g |
| Fat | 12 g |
| Saturated Fat | 2 g |
| Carbohydrates | 32 g |
| Sugar | 18 g |
| Fiber | 1 g |
| Sodium | 120 mg |
FAQs About Zebra Cakes
What makes zebra cakes different from marble cakes?
Zebra cakes feature distinct, layered stripes created by alternating batters, while marble cakes have a swirled pattern achieved by mixing the batters together.
Can I make zebra cakes gluten-free?
Replace the all-purpose flour with a gluten-free baking mix for an alternative option. Ensure the mix contains a binding agent like xanthan gum for the best results.
What’s the best pan size for zebra cakes?
A 9-inch round pan is ideal for creating the zebra pattern, but you can experiment with other sizes for different effects.
Can I use other flavors instead of vanilla and chocolate?
Absolutely! Try pairing strawberry and vanilla or lemon and blueberry batters for a colorful twist.
Conclusion
Zebra cakes are the perfect blend of simplicity and sophistication, making them an excellent choice for bakers of all skill levels. With their eye-catching design and delightful flavor, these cakes are sure to impress family and friends. So, roll up your sleeves and give this recipe a try—you’ll be amazed at how easy it is to create such a stunning dessert.
We’d love to hear about your creations and experiences—share them in the comments! Be sure to check out our other mouthwatering recipes for more baking ideas!