
There’s something magical about baking cookies at home—the smell that fills the kitchen, the excitement as the dough transforms into delicious, golden treats, and of course, the first bite of a warm, crispy cookie. If you’re in search of the perfect cookie recipe to try, look no further than windmill cookies. These delightful treats offer a crunchy, sweet bite with the perfect balance of spice, and their charming windmill shape adds a unique touch to your baking repertoire. In this guide, you’ll learn how to make windmill cookies at home with a step-by-step recipe, pro tips, and some creative variations to take your cookies to the next level.
Table of Contents
What Are Windmill Cookies?
Windmill cookies are crisp, sweet treats that often feature a blend of warming spices such as cinnamon and ginger. They are known for their delicate texture, which is slightly crunchy on the outside and perfectly tender on the inside. Their distinct windmill shape, typically created with a cookie cutter, adds a fun, festive flair that makes them a favorite around the holidays or whenever you need a little something special for tea time.
Originating from the Netherlands, windmill cookies are also referred to as Dutch spice cookies, and they have been a beloved part of European baking traditions for centuries. These cookies are commonly enjoyed during Christmas, but their delicious flavor and crisp texture make them a treat worth baking year-round.
Ingredients You’ll Need to Make Perfect Windmill Cookies
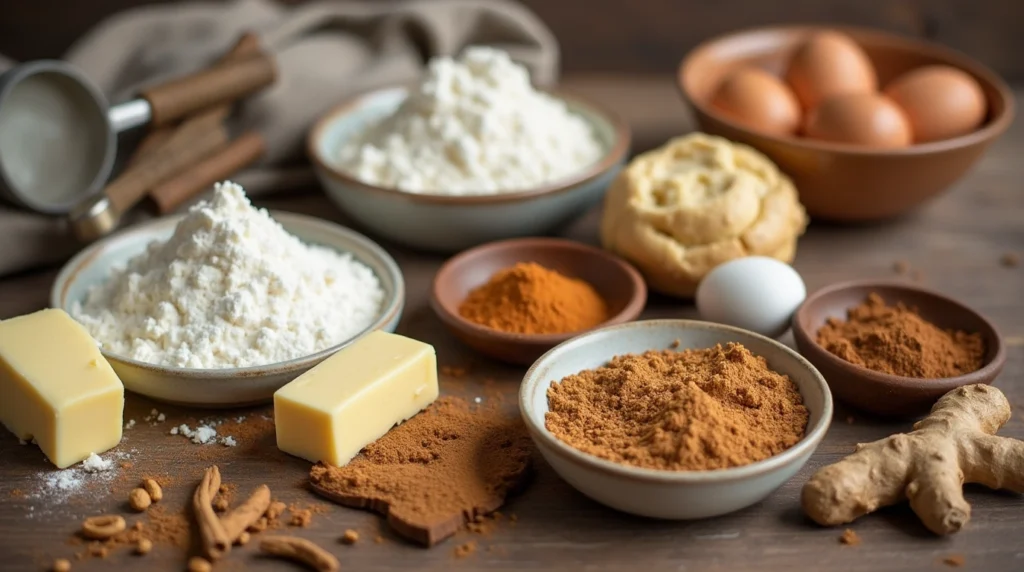
Before you dive into the baking process, gather the following ingredients to make your windmill cookies. This recipe is straightforward, and you’ll likely have most of these pantry staples on hand.
| Ingredient | Amount |
| Unsalted butter | 1 cup (softened) |
| Granulated sugar | 1 cup |
| Brown sugar | ½ cup |
| All-purpose flour | 2 ½ cups |
| Ground cinnamon | 1 tsp |
| Ground ginger | 1 tsp |
| Baking soda | 1 tsp |
| Egg | 1 large |
| Vanilla extract | 1 tsp |
| Salt | ½ tsp |
Feel free to get creative with the recipe by adding ingredients like chopped almonds, ground cloves, or even chocolate chips if you’re craving a different flavor profile.
Ingredient Substitutions
- Gluten-Free Option: Substitute the all-purpose flour with a gluten-free flour blend to make the recipe gluten-free.
- Dairy-Free Option: Use a plant-based butter alternative and a dairy-free egg substitute, such as flax egg or applesauce.
- Nut-Free Option: If you’d like to make the recipe nut-free, simply omit any nuts or nut-based extracts.
Step-by-Step Guide to Baking Windmill Cookies
Step 1: Preheat Your Oven and Prepare Your Baking Tools
Start by preheating your oven to 350°F (175°C) before preparing your dough. Prepare two baking sheets by lining them with parchment paper or silicone mats to help your cookies bake uniformly and prevent sticking. Having all your tools ready will make the entire process smoother and more enjoyable.
Step 2: Cream the Butter and Sugars
In a large mixing bowl, cream together the softened butter, granulated sugar, and brown sugar. Use an electric mixer on medium speed or a wooden spoon to mix until the batter becomes light and airy. This will usually take about 3-4 minutes. Creaming the butter and sugar properly is key to achieving a smooth dough and a light texture in your cookies.
Step 3: Add the Wet Ingredients
Once your butter and sugars are well combined, add the egg and vanilla extract to the mixture. Continue mixing until everything is fully incorporated. The egg helps to bind the ingredients and gives your windmill cookies their tender texture.
Step 4: Mix the Dry Ingredients
In a separate bowl, whisk together the all-purpose flour, cinnamon, ginger, baking soda, and salt. These ingredients will form the base of your dough, and the spices are what give windmill cookies their signature flavor. Gradually add the dry mixture to the wet ingredients, stirring until the dough comes together. You should have a soft, non-sticky dough that is easy to handle.
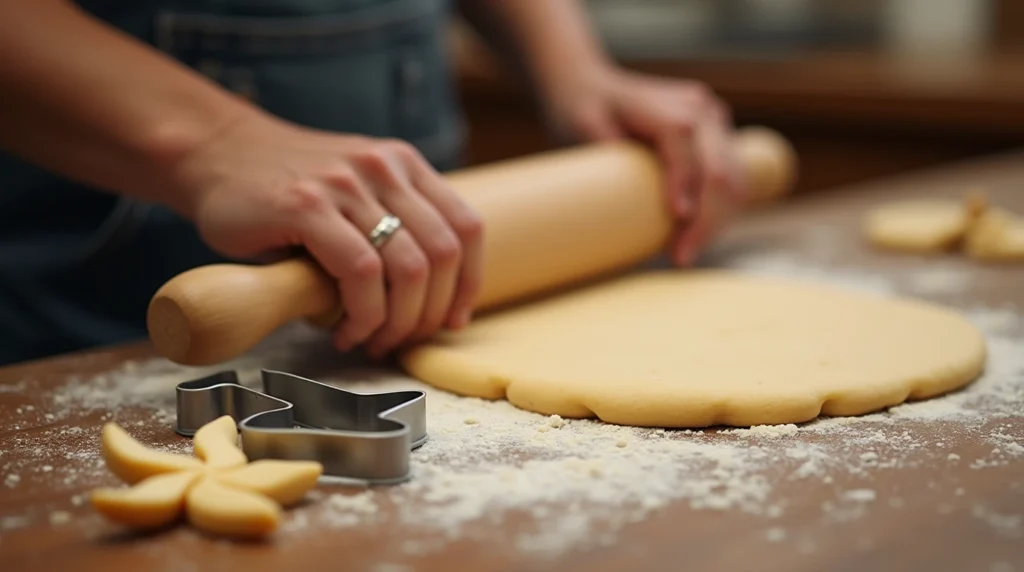
Step 5: Roll Out the Dough and Cut the Windmill Shapes
Flatten one portion of the dough on a surface dusted with flour to a thickness of about ¼ inch. Use a windmill-shaped cookie cutter to cut out your cookies. If you don’t have a windmill cutter, a traditional round or square shape will work just as well. If you want to get creative, you can also make various shapes to suit your occasion.
Step 6: Bake the Cookies
Place the cut-out dough on the prepared baking sheets, leaving about 2 inches between each cookie. Bake them in the preheated oven for about 10-12 minutes, or until the edges are golden brown and the cookies are crisp. Monitor the baking time closely to prevent overbaking; watch the cookies carefully as they cook.
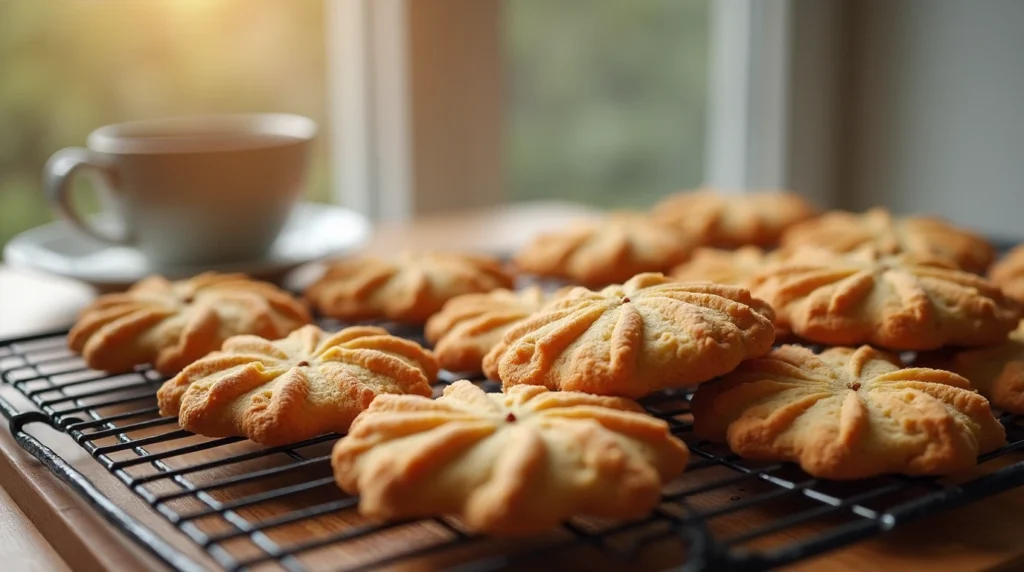
Step 7: Cool and Store Your Cookies
After baking, let your windmill cookies cool on the baking sheets for a few minutes before transferring them to a wire rack to cool completely. This allows them to firm up and achieve the perfect crispy texture. Keep your cookies fresh by storing them in an airtight container at room temperature for up to a week. Alternatively, freeze them for extended storage.
Tips for Perfect Windmill Cookies Every Time
- Chill the Dough: If your dough feels too soft or sticky, chill it for 30 minutes before rolling it out. This will make the dough easier to work with and help the cookies maintain their shape while baking.
- Watch the Baking Time: Keep an eye on the cookies as they bake. They can go from perfectly golden to overbaked in just a minute or two.
- Use Fresh Spices: To ensure that your windmill cookies have the best flavor, use fresh cinnamon and ginger. These spices lose their potency over time, so replacing them periodically will result in more aromatic cookies.
- Decorate for Extra Flair: If you want to make your windmill cookies even more festive, dust them with powdered sugar or add colorful sprinkles or icing.
FAQs About Windmill Cookies
Q: How Can I Make My Windmill Cookies Crispier?
A: To achieve an even crispier texture, you can flatten the dough slightly before baking. Additionally, using a little less butter or sugar can result in a crisper bite.
Q: Can I Make These Cookies Ahead of Time?
A: Yes! You can freeze the cookie dough for up to three months. Simply wrap it in plastic wrap and store it in a freezer-safe bag. When ready to bake, thaw the dough and proceed with the recipe.
Q: Can I Use Different Cookie Cutters for Windmill Cookies?
A: Absolutely! While traditional windmill cookie shapes are fun, feel free to use any cookie cutter that fits your theme or mood. Christmas trees, stars, or hearts can add variety to your cookie assortment.
Q: How Do I Store Windmill Cookies for Freshness?
A: Keep your windmill cookies in an airtight container at room temperature. If you want to extend their shelf life, you can also freeze them for up to three months.
Creative Variations of Windmill Cookies
While the classic windmill shape and spice combination are delicious, don’t hesitate to try some variations on this recipe. Here are a few ideas:
- Add Almonds or Hazelnuts: Incorporate chopped nuts into the dough for added crunch and flavor.
- Chocolate Chips: For a decadent twist, fold in some chocolate chips to the dough for a sweet contrast with the spices.
- Decorate for Special Occasions: For the holidays, decorate the cookies with royal icing or sprinkle with sugar before baking for a festive touch.
Enjoy Homemade Windmill Cookies Anytime :
Baking windmill cookies at home is a fun and rewarding experience. With their crisp texture and sweet-spiced flavor, these cookies make the perfect treat for any occasion. Whether you’re baking for a special holiday or just looking for a delicious snack, this simple windmill cookie recipe will bring joy to your kitchen and your taste buds.
Ready to bake your own batch of windmill cookies? Grab your ingredients, follow the easy steps, and enjoy the satisfaction of homemade perfection. Don’t forget to share your baking experience with friends and family, and let us know how your cookies turned out!
Nutritional Information :
While cookies are a treat, it’s always good to know what’s inside them. Here’s a general breakdown of the nutritional content per cookie (assuming 24 cookies from the recipe):
- Calories: 120
- Total Fat: 6g
- Saturated Fat: 3.5g
- Cholesterol: 20mg
- Sodium: 50mg
- Total Carbohydrates: 17g
- Dietary Fiber: 0.5g
- Sugars: 10g
- Protein: 1g
This is an estimate, and the actual nutritional content may vary depending on the specific ingredients you use. Enjoy your windmill cookies in moderation as part of a balanced diet!